


Tenant's Toolkit: Comprehensive Guide to End of Tenancy House Cleaning
Posted on 08/09/2025
Tenant's Toolkit: Comprehensive Guide to End of Tenancy House Cleaning
Moving out is an exciting yet stressful phase in every tenant's journey. One of the most crucial - and often underestimated - tasks is the end of tenancy cleaning. Not only does a thorough clean influence whether you recover your full security deposit, but it also sets a positive tone with your landlord or property manager. Whether you live in a cozy studio, a spacious apartment, or a family home, arming yourself with the right end of tenancy cleaning checklist and know-how is essential. In this comprehensive guide to end of tenancy house cleaning, we'll break down every step for an organized, efficient, and effective move-out clean. Get ready for sparkling results!
Why End of Tenancy Cleaning Matters
End of tenancy cleaning plays a pivotal role for tenants, landlords, and future residents. Before surrendering your keys, landlords typically expect you to leave their property in pristine condition. Failing to meet expected standards can lead to deductions from your deposit, strained relationships, and delays for the next tenants. Adequate cleaning safeguards your reputation as a respectful renter and helps ensure a smooth transition.
- Protect Your Deposit: Professional-level cleaning reduces disputes and maximizes your chances of a full deposit refund.
- Meet Contractual Obligations: Most tenancy agreements explicitly require returning the property as clean as it was received.
- Support the Next Occupant: Thoughtful cleaning fosters goodwill and makes moving easier for the next tenant.
- Avoid Extra Fees: Landlords often charge premium rates for post-tenancy cleaning if standards aren't met.
What Is Included in End of Tenancy Cleaning?
End of tenancy house cleaning demands a far deeper and more comprehensive effort than everyday tidying. Typically, it involves cleaning all rooms and surfaces, inside and out, including hidden and hard-to-reach spots.
- Kitchens: Appliances, cupboards, worktops, sinks, extractor fans, tiles, floors, and bins.
- Bathrooms: Showers/baths, toilets, sinks, mirrors, tiles, and floors.
- Living Areas/Bedrooms: Carpets, skirting boards, furniture, light fittings, switches, and doors.
- Windows: Interior and, where accessible, exterior glazing and frames.
- Other Areas: Hallways, stairwells, storage spaces, and outdoor areas like balconies or patios.
A successful end of tenancy clean addresses both visible and invisible dirt, focusing on hygiene, odour removal, and presentation.
Preparing for a Successful Move-Out Clean
1. Review Your Tenancy Agreement
Before you lift a mop or duster, carefully examine your rental agreement. Most contracts list specific end of lease cleaning requirements, expected standards, and what 'reasonable wear and tear' does or doesn't cover. Note any areas where you may need to pay special attention, such as professionally cleaned carpets or oven.
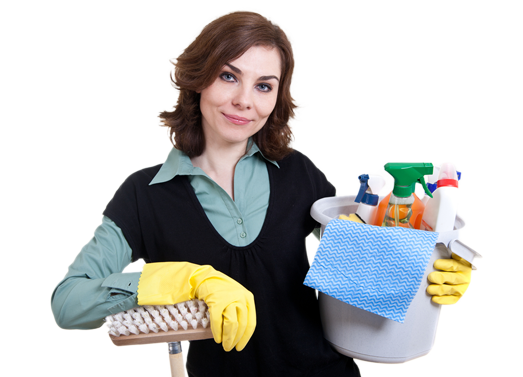
2. Gather Essential Cleaning Supplies
You'll need a robust arsenal of cleaning tools and products to tackle every room. Here is a recommended toolkit for a deep end of tenancy clean:
- Microfiber cloths and sponges
- Mop, bucket, and broom
- Vacuum cleaner (with attachments)
- Glass cleaner (streak-free for windows and mirrors)
- Multi-surface disinfectant
- Degreaser (especially for kitchen)
- Limescale remover (vital for bathroom taps and showerheads)
- Oven cleaning products
- Toilet cleaner and brush
- Rubber gloves and protective mask
- Garbage bags (heavy-duty for rubbish and unwanted items)
3. Plan and Schedule Your Cleaning
Block out sufficient time -- typically one to two days for a thorough move out cleaning, depending on the property's size and condition. If possible, clear out your belongings before starting, making it easier to reach all areas.
Room-by-Room End of Tenancy Cleaning Guide
Below we provide a detailed checklist and practical tips for each room, ensuring nothing gets missed during your end of tenancy house cleaning process.
Kitchens: The Heart of the Home
- Oven and Hob: Remove all racks/trays, soak in degreaser, and scrub thoroughly. Clean glass doors and any ventilation panels.
- Fridge and Freezer: Defrost, empty, clean all internal and external surfaces, and leave the door ajar to prevent mold.
- Cabinets and Drawers: Empty, wipe inside and out, and clean handles. Don't forget the tops and backs.
- Sinks and Taps: Descale, disinfect, polish, and clear any drains.
- Worktops: Remove food residue, limescale, and stains. Disinfect thoroughly.
- Extractor Fan and Filters: Remove built-up grease and replace or wash filters if possible.
- Dishwasher and Washing Machine: Clean seals, trays, and run a hot cleaning cycle.
- Floors and Skirting Boards: Sweep, mop, and pay attention to corners.
- Windows and Window Sills: Clean glass and wipe frames inside and out.
Bathrooms: Hygiene Is Paramount
- Shower, Tub, and Tiles: Remove soap scum, limescale, and mildew. Deep clean grout and all glass or plastic screens.
- Toilet: Deep scrub inside and outside, clean the cistern, and disinfect handle.
- Sinks and Taps: Remove limescale, polish, and disinfect all surfaces.
- Mirrors: Use streak-free glass cleaner for a spotless shine.
- Cabinets: Wipe inside and out; dispose of forgotten toiletries.
- Floors: Scrub tiles or mop vinyl, paying attention to edges and behind fixtures.
- Extractor Fan: Clean vent covers and remove dust.
Living Rooms & Bedrooms: Comfort Zones
- Carpets and Rugs: Vacuum thoroughly. If required, arrange professional carpet cleaning.
- Upholstery and Curtains: Clean or vacuum fabric, wash removable covers, and dust curtain rails.
- Furniture: Wipe all hard surfaces and clean any drawers, cupboards, and shelving.
- Light Fittings and Switches: Dust all fixtures and clean switches/plug sockets with care.
- Skirting Boards and Doors: Wipe down to remove dust and fingerprints.
- Windows: Clean glass, frames, and window sills.
Hallways, Stairs, and Entrances
- Floors: Sweep, vacuum, and mop as appropriate.
- Banisters and Railings: Wipe down with disinfectant.
- Doors and Door Handles: Disinfect thoroughly, including the letterbox and locks.
Other Areas to Remember
- Storage Cupboards: Empty, clean shelves, and vacuum floors.
- Outdoor Spaces: Tidy up patios, balconies, and bin areas.
- Smoke Detectors: Test and dust off as needed.
Frequently Missed Spots in End of Tenancy Cleans
Even diligent tenants may overlook certain areas during final house cleaning. Be sure to address these commonly neglected spots:
- Behind and beneath appliances
- Inside kitchen extractor hoods
- On top of door frames and cabinets
- Radiators - tops and behind
- Inside window tracks and sills
- Light bulbs and shades
- Inside wardrobes and closets
DIY vs. Professional End of Tenancy Cleaning Services
Should you clean yourself or hire professionals? Each approach to end of tenancy cleaning has its pros and cons:
- DIY Cleaning: Cost-effective and gives you control. Ideal for smaller, well-maintained homes and tenants with time, energy, and a commitment to detail.
- Professional Cleaning Services: Offers guaranteed results and saves time and energy. Essential for large properties, heavy staining, or if your landlord requires a professional cleaning receipt.
If you choose to hire a cleaning company, always check their end of tenancy cleaning checklist and confirm they issue a certificate or receipt for your landlord.
Top Tips for a Stress-Free End of Tenancy Clean
- De-clutter first: Remove rubbish and unwanted items before starting to clean.
- Clean from top to bottom: Dust and wipe high surfaces before cleaning floors.
- Document your work: Take before-and-after photos. This protects you from unfair disputes.
- Get help: Divide tasks amongst friends, roommates, or family if time is short.
- Fix minor damage: Patch small holes, replace light bulbs, and tighten loose fittings.
- Refresh air quality: Open windows and use deodorizers to eliminate lingering smells.
- Double-check key contract areas: Pay extra attention to items highlighted in your tenancy agreement.
- Book a professional clean in advance: Peak move-out periods often get booked up fast.
Checklist for End of Tenancy Cleaning
For optimal results and peace of mind, use this end of tenancy cleaning checklist as your guide:
- Remove cobwebs and dust from ceiling corners
- Wipe down and disinfect all door handles and light switches
- Spot-clean walls and remove scuff marks (if possible)
- Clean windows (interior and accessible exterior) and window sills
- Wash and polish mirrors and glass surfaces
- Wipe skirting boards and moldings throughout
- Vacuum and mop all floors, paying attention to corners
- Sanitize kitchen counters, sinks, and appliances
- Deep clean oven, hob, and extractor fan
- Empty and clean inside all cupboards, cabinets, and drawers
- Clean and disinfect bathroom fixtures including taps, showers, bathtubs, toilets, and tile grout
- Empty and clean bins, remove all rubbish
- Clean radiators and behind them
- Dust and wipe heating vents, extractor fans, and air conditioners
- Check garage, balcony, garden, or outdoor areas
What Landlords Look For in End of Tenancy Cleanliness
Your landlord or lettings agent will usually inspect the property soon after you vacate. They focus on the following:
- Overall hygiene and freshness
- Absence of stains, limescale, and dirt build-up
- Clean appliances and fixtures
- No visible pet hair, odours, or allergies triggers
- Tidy and rubbish-free exterior areas
- Compliance with inventory report and move-in conditions
Common End of Tenancy House Cleaning Mistakes to Avoid
- Leaving personal items behind
- Ignoring small repairs that could be cheap to fix
- Overlooking inside appliances and cupboards
- Forgeting to check hidden or hard-to-reach spaces
- Using incorrect products and damaging surfaces
- Failing to keep a photographic record as evidence

Preparing for Inspection and Deposit Return
Once cleaning is finished, walk through the property with your own move-out checklist. If possible, invite your landlord or agent to inspect with you, referencing the original inventory report. Present receipts for professional cleaning if required in your tenancy agreement.
Take clear photos of each room and any cleaned appliances as evidence of the quality. This protects you from unfair deductions and delays.
Summary: Your End of Tenancy Cleaning Toolkit
A successful end of tenancy house cleaning ensures a smooth transition, maintains your tenant reputation, and protects your financial interests. With the essential cleaning tools, a detailed checklist, and a clear understanding of expectations, you'll leave the property as fresh and inviting as you found it.
- Check your contract and original inventory report for specific requirements
- Gather the right cleaning products and equipment
- De-clutter and clear out possessions before you clean
- Work systematically from room to room using this guide's checklists
- Consider hiring professionals for large properties or if required
- Document your results to avoid deposit deductions